|
Step 1: Go online with your ISP
Step 2: Open Your Microsoft Outlook E-Mail Client
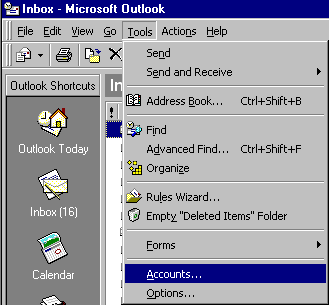
Step 3: Select Tools/Accounts from the Menu Bar as shown below.
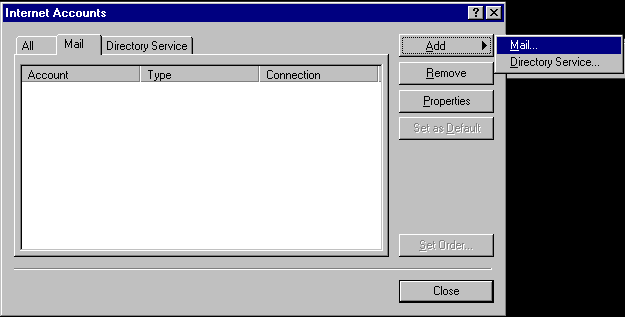
Step 4: Select the Mail Tab, Add, Mail, as shown below.
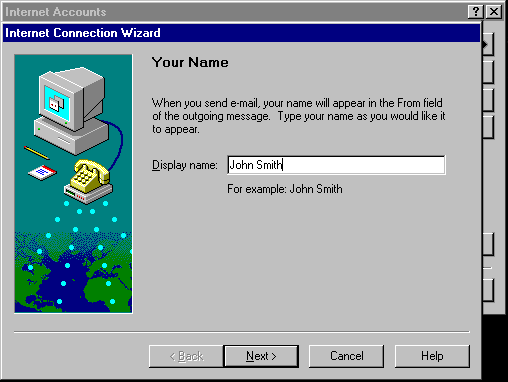
Step 5: Enter Your Real Name.
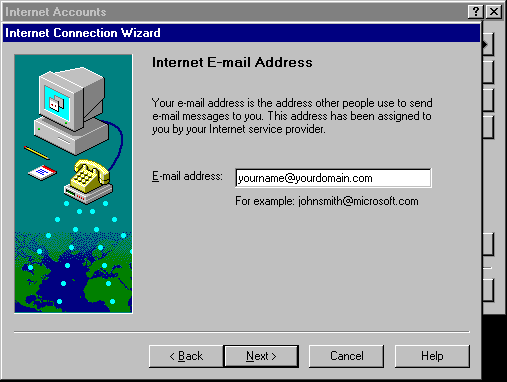
Step 6: Enter Your E-Mail Address.
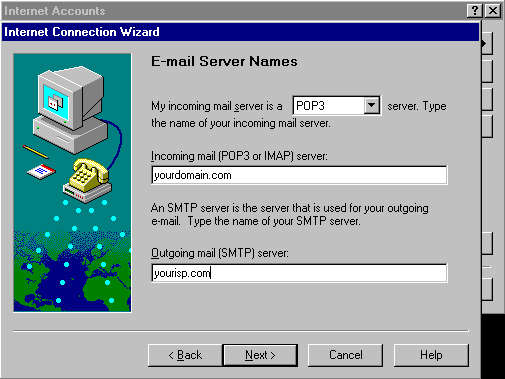
Step 7: Enter your Domain Name as the incoming (POP3) Server as shown below.
For the Ougoing (SMTP) Server, we recommend that you use your ISP’s SMTP Server since this configuration works best. Most ISP’s offer an SMTP Server free with their dial-up service and all you need to do is call them to find out what that SMTP server name is.
In the event your ISP does not offer an SMTP Server (Like AOL), then ou can use your domain name as the Outgoing (SMTP) Server. But when using this method you will need to make one small change to your setting to accomodate this. Simply give us a call and we’ll be more than happy to explain what needs to be done.
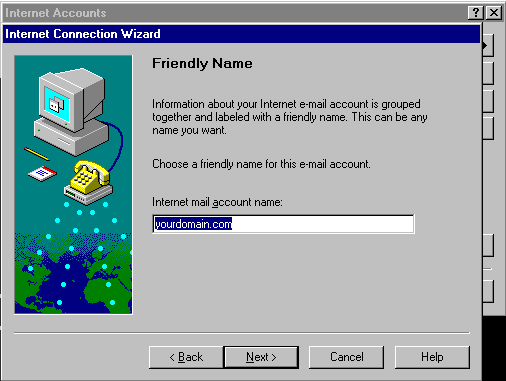
Step 8: Enter your Mailbox Name and Password as shown below. This is the same Mailbox Name and password you created in your site’s Control Panel.

Step 8: Enter your Mailbox Name and Password as shown below. This is the same Mailbox Name and password you created in your site’s Control Panel.
Step 10: Select the appropriate Connection Type. Most people choose “Connect using my phone line” This will bring you online when you run Microsoft Outlook. For those using BroadBand Services like, DSL, CableModems, or Fixed Wireless Access, you should select, “Connect using my Local Area Network (LAN)”.

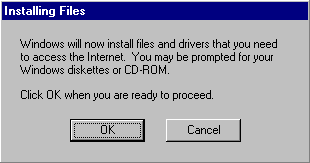
Step 11: Occasionally this next pop-up will appear. Have ready your Windows Installation CD Ready
Then Click the “OK” button to install this mailbox.
Sending and Receiving E-Mail
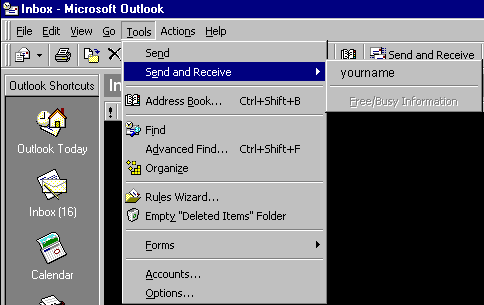
Step 1: There are two ways to receive your E-Mail. 1) There is usually a button on the top of Oulook that says, “Send/Receive” Or you can click on Tools - Send & Receive as shown below.
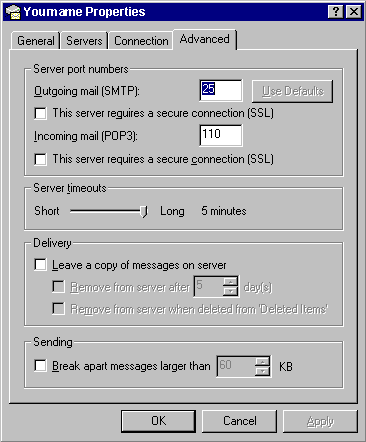
Timeout Problems when Receiving E-Mail
If you experience mail timeouts when trying to receive your E-Mail, change the E-Mail timeout settings as shown below.
Step 1: Select Tools/Accounts from the Top Menu Bar
Step 2: Select the correct mail account (Yourname) and Click on “Properties”
Step 3: Set the “Server Timeouts” to its maximum setting and select “OK”
That’s It!
|